Feb 27, 2015

Emily's Owl Quilt

My grandkids are growing up so fast! It's hard to believe that just a short 11 years ago I had one grandbaby and that she was only 6 months old. Now I have eight grandchildren and the oldest is in middle school! Where does the time go?

When my oldest granddaughter, Katelyn, turned 10 we decided it was time for her to have a "big girl" quilt and so I made her this one

Now my #2 grand, Emily, has turned 10. It seems like just yesterday since she was a baby...


But the years fly by and before you know it she walking and talking and then is a preschooler.


Whenever I think of Emily, it is her blonde hair, great big blue eyes and her sweet smile that spring to mind. You can see her spirit shining thru.


Then you turn around again and she's in school. Emily has such a zest for life! Always ready to join in any activity.


This has been Emily's year at school! She was selected for the accelerated program, the Odyssey of the Mind team, state honor choir and got the lead in the school play! What more could a girl ask for? 


 Alice in Wonderland

Emily has been eagerly awaiting her grown up quilt. She talked about it for months before her birthday. She even had a special quilt request. She wanted an owl quilt. We discussed whether it was to be a scrappy quilt made with owl fabrics or a quilt with an owl on it. She picked the latter. 

I found some really cute fabric on Etsy that had owls on it and I couldn't resist it for the backing. It became the inspiration for the whole quilt. I loved the colors, too. It was perfect!!


I wanted this owl as my applique on the front of the quilt....

I had my husband draw it really big for me. This little guy is now 20" tall.

My idea was to have him sitting on the branch of a tree....


so I stuck my owl drawing on my background fabric and put my tree fabric up to see if it was going to work. I think it just might. :)


I took my tree fabric to my cutting table, turned it over and started drawing a tree trunk and two limbs. This was very gutsy of me because I am not an artsy person and I don't do anything without a pattern!! I took the scissors to it and cut it out-there was no turning back now! I glued the tree to the background fabric using little tiny drops of Roxanne's glue. 


I had picked out fabrics for the owl at the quilt shop, so I knew what I was going to use. I was getting excited about this quilt!!


Next came leaves. I free form cut those too.  Where was this inner artist coming from???


All of the applique has been done and the borders added. Next was quilting.


The background was a simple stipple with a few stars and a moon quilted into it. 


The tree trunk intimidated me until my friend Judy told me how to do it. I was really pleased with how it turned out!


Here is detail of the quilting on the owl. I quilted "feathers" on his wings, crosshatched his belly and quilted circles in the whites of his eyes.


Emily did not want a label. She wanted me to write on the back of her quilt. So I did just what she wanted.


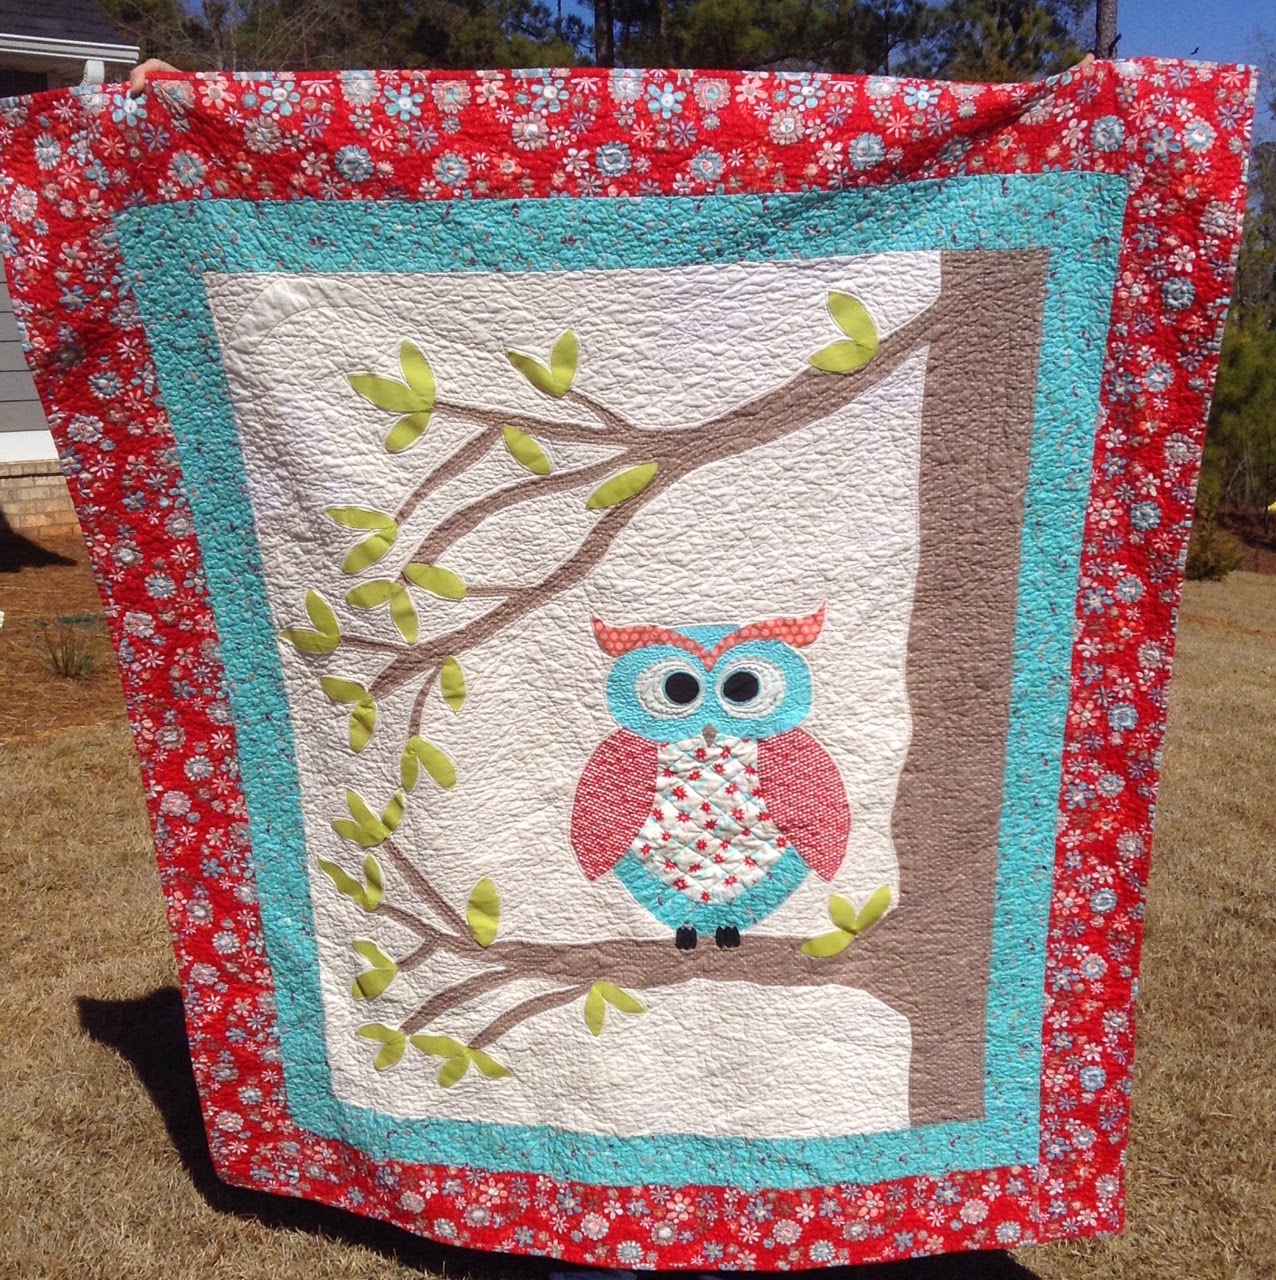
The quilt is finished!! I am so happy with the results and Emily was absolutely ecstatic! I have 15 months until Madison turns 10. I better start thinking about her quilt now. In the meantime-I still have Gabby's baby quilt on my design wall!!

Happy quilting, 

Grammy


Feb 23, 2015

Dress Form Pincushion and Pins


For Christmas, my friend, Judy gave me a wonderful gift. It's both very cute and very practical. She said she wanted to make me pins to use for marking my quilt blocks and rows and then decided to find a cute pincushion to put them in. She found this one at JoAnn's and knew that I would love it! And I do!!


What a thoughtful gift! The pins are all color coded and stuck into the pin cushion in numerical or alphabetical order. 


So, now when I have my blocks on my design wall and I need to take them down to stitch them, I can put pins in them before I move them and nothing is ever out of order. I can also mark my rows so that later when I am sewing them together I am able to keep them in the same position. 


To make the pins, Judy started with pearl head straight pins, alphabet and number beads, small crystal beads and crimp beads. For each set she added an alphabet bead, a crystal bead and then a crimp bead (you find crimp beads in the jewelry making section of your local craft store. The purpose of the crimp bead is to squeeze it closed around the pin, so that the other beads do not fall off.) You can add your beads in any order you prefer. 


I have a quilt on my design wall that is set on point and I have already put my number beads to good use keeping my rows straight. 


This pincushion and these pins are going to get a LOT of use. And I'm going to think of Judy every time I do. 


Happy quilting.....and pinnning,

Grammy


Feb 19, 2015

Guest Speakers

Last Fall my friend Pam asked Anne and me to come visit her in January and join her at her quilt guild meeting. She wanted the three of us to give the program on Round Robin quilts. Since the we have participated in five round robins together, we had plenty of quilts to show and ideas to share with Pam's guild. This was going to be fun!

I got out all my round robins. Only one was finished! A second one was 75% quilted and the other three were tops. I had to finish up as many of my Round Robins as possible in the time allowed. But I had a cast on my arm at the time and the holidays ahead of me. This was going to be a challenge. 

We had a great time at Pam's quilt guild. They seemed to really enjoy our presentation, had lots of questions, and even took pictures of us. We had a great time too. Maybe we should take our show on the road. ;)


Pam is showing her Amish Stars quilt. It was our first Round Robin.


We also talked about the difference in a Round Robin and a block swap. We showed Anne's chicken quilt at the end of our talk. It's a block swap the three of us did years ago using chicken patterns and dozens of chicken fabrics. It's always a hit! 

Happy Quilting!

Grammy

Feb 16, 2015

The Cat's Meow

In 2003 I participated in another Round Robin. We decided to "go small" that year and make 4" blocks. Our theme blocks could be any size or theme that we wanted, but everyone would be adding four 4" blocks for the quilt.

I had been collecting indigo fabrics for several years. In case you are not familiar with them, they are absolutely yummy fabrics, but are difficult to find. Whenever I have attended a quilt show where there was a vendor selling them, I have just had to buy a few. By now my collection was growing and it was time to use them.

My collection of Indigos

True indigo fabrics (called Shweshwe in Africa) are acid discharged prints on cotton fabric using copper plates. The fabrics are manufactured by the DaGama Textile Company of South Africa and their most popular export lines are Three Leopards and Three Cats.  When you buy indigo fabric is VERY stiff and the color will actually rub off on your hands. Before you can use it in your quilt, you must first zig-zag or serge the edges to keep it from fraying, then wash the fabrics in cold water with Orvus Soap (or other non-phosphate free detergent). After a cold water rinse, test your fabric by rubbing it on a white cloth to see if it is still fading. Repeat the rinsing if it is. Using Retayne in the rinse cycle will help set the color. Be sure to shake out your fabrics before placing them in the dryer. When they come out, they are going to be soft and wonderful!!

The Three Cats logo

The Three Leopards logo

Though they do not make as many prints, 
you can also buy them in red

I decided on a sampler style quilt, with each block different. It was going to be perfect made from my indigos and paired with shirtings!! 


My four blocks were a Star, Flying Dutchman, 
Bowtie and Snail's Trail.


I made my blocks, wrote about my vision for my quilt in my journal and put it in the mail. For this round robin I included my indigos since they are a special fabric not available at your local quilt shop. I was so excited-I couldn't wait to get my quilt blocks back!!

My friends did not disappoint! The blocks were beautiful-just as intricate and detailed as any Dear Jane block. Most were paper pieced and they had each put their name on the paper so I knew who made each one. I laid them out and sewed them together with a narrow sashing. I then added a small border. 

Then I put it away.......for a REALLY.....LONG.....TIME..........

And out of sight was out of mind. Every now and then I got it out and looked at it, but just wasn't in the mood to quilt it. I couldn't think of anyway to quilt it except in the ditch.

Fast forward to Fall, 2014 when Pam told me that her quilt guild wanted Anne and me to come speak with her at their January meeting about Round Robins. Well, now the pressure was on! How many of these Round Robins that I had laying around could I get finished before I went to Pam's?

The time had come to bite the bullet and quilt this bad boy. Still no inspiration came to me, so I quilted it in the ditch. Though the quilting doesn't show I think it's all it needs right now. It's finally finished and I'm so happy to finally have it done!


Happy Quilting! 

Grammy

Feb 14, 2015

Happy Valentine's Day

Happy Valentine's Day! This was my gift for my husband this year. It was a complete Pinterest hack, but I still had so much fun doing it. I hope your day is sweet too.


Feb 13, 2015

Folk Art Friends

Long, long ago in a town far, far away.........

I feel like that is how this blog post should start because my oldest UFO is now officially FINISHED!!!

In the Fall of 2000 I started a Round Robin with eight quilting friends that I met at Carlisle Barracks, Pennsylvania. Six of us had done round robins the year before and had a great time. Now nine of us were going to participate. Our biggest challenge this time around was going to be the fact that we had all moved and were spread all over the US and one was even now living in Korea! So these round robins were going to be mailed every month and they were going to be doing some extensive traveling.

After much discussion, we decided that we wanted to do a wallhanging size quilt with a planned "puzzle" layout. One of the ladies in our group drew a diagram with dimensions for each block and assigned each block a month. Before we began, we each got the rules for our round robin and this drawing in the mail. 


You have to forgive my picture because I wrote on my paper to make it easier for me to remember whose quilt I was going to be working on each month. Our theme blocks were the 12X12 that are marked "Sept". We were to mail our blocks the end of that month.


The theme for my quilt was Folk Art Friends. I had never done any applique and it shows! This is VERY primitive-my blanket stitch is every size imaginable! The flower head was originally appliqued down too, but when I was quilting it in 2008 or so and I sprayed the top with water to remove my blue marking lines, the red floss that I used bled on my quilt! I removed the offending floss and after many attempts to get the red all out, I was so distraught that I put the quilt aside and didn't finish quilting it. When I went back recently to finish the quilting I decided to leave the flower unstitched as a reminder of what had happened. There is still a hint of pink in this block, but I finally decided that finished is better than perfect and I got over it.


I wrote in a journal to pass with my quilt and made a label for everyone to sign. 

So, month by month, as my quilt was passed from one person to another and each added a block to my quilt, I was busy working on blocks for theirs. 


In October we were supposed to use 3 3X9" rectangles as our background. I loved Pam's birdhouse hanging on the branch and her cat in front of a harvest moon. 


In November, the block was only 5X9" and Sue added a really cute log cabin. 


For December the block was a horizontal 4X12. Jan made this adorable angel-look at the stars at the tips of her hair! So much attention to detail!


January had our blocks turned on point and 14" square. I loved this Amish-inspired man and woman Judy made. 


For February, Pam D. used a flannel for a row of flowers in her 5X14" space. 


Beth made baskets in the 4 6" blocks for March. Look at the cute jute handles she appliqued on! 


April was a TALL skinny block 4X28 and Bev put a potted flower there. Just perfect for that space!


The last month was May and it was the biggest challenge for everyone. There was so much measuring and figuring-and curved piecing! Anne did a beautiful job with my flannel crow!! This crowning piece is 30X7!


We got together for a fun reunion and were all thrilled to get our quilts back!! The themes were so much fun and I had enjoyed working on everyone else's quilts all year too. Snowmen, Halloween, Primitive, Chickens, "Seedtime and Harvest", Flowers, Alaska, and "Home is Where the Army Sends You" were the other quilts. They are turned out fantastic and I wish I had pictures of them to share with you, too. 


I picked a fun backing fabric that I thought went well with my theme and I love the label on the back of my quilt. 


I'm so happy to finally have this quilt in the finished column so I can check that block!

Happy Quilting!

Grammy