Showing posts with label Judy. Show all posts

Sep 25, 2015

Sew Together Bags


The Sew Together Bag is undeniably cute. I keep seeing it everywhere-blogs, Pinterest, and in quilt shops. I decided it would be the perfect gift to make for my friends for our trip to Chattanooga. In hindsight--I needed to have made this decision more than five days ahead of time! 

First I bought the digital pattern and downloaded it from Craftsy. The pattern says that the skill level is "beginner" and I beg to differ. I have been clothing and craft sewing and following a pattern for 50 years. (Yes, I'm that stinking old!!) I do not consider myself a beginner by any stretch of the imagination. But I must admit that these instructions are not well written and some photos or diagrams along the way would really simplify things!! My saving grace was the Sew-A-Long I found on Quilt Barn's blog. Here is the link to her FABULOUS step by step instructions complete with pictures. If you decide to give this pattern a go, do yourself a favor and visit Quilt Barn's blog!

I wanted to make each bag to fit the personality and likes of the recipient. Judy loves very modern quilts and solid fabrics. Anne has a new found love for Tula Pink. And Pam is totally over the moon for French General, scrappy and anything with buttons. Easy Peasy. 

A trip to my favorite quilt shop yielded fabrics for Judy and Anne and a stop at JoAnn's for zippers, thread and buttons and I was all set. 

Making the oustide of the bags was the most fun. That was where the creativity came out. Colorblocking for Judy's bag with coordinating stitching lines in various widths gave it the modern look I was going for.


I wanted to give Anne's bag a tailored look and showcase the diamond fabric. I followed the diamond shape to quilt it.


For Pam's bag I raided my French General stash, cutting 2 1/2" squares. A simple quilting on the diagonal and three buttons finished it off nicely.


Lots of whining and ripping later I had all three bags to this stage--


The night before we left I finished Pam's and Judy's, but at 1:00am, I still had the final zipper to go for Anne's bag. We were leaving at 6:30 and I had just 5 1/2 hours iron, pack, shower and get a little shut eye, so I had to call it a night. :(  Anne was spending the night with me and she had given me "permission" to finish hers on Friday, when we returned from the show. I took her up on it!

That's why two bags are finished and the third one lacks a zipper here--


Here are close ups of each of the bags. Judy's first. I do not have a picture with the pockets open-but the zipper color is a hint to the fabric color on the inside. 


This is Anne's-finally finished! The polka dot fabric on the inside of the pockets is a Kaffe Fassett.


Pam's was scrappy enough on the outside that I kept the inside pretty simple. One fabric for the lining and another for inside the pockets. 


I wanted to mention that if you want to make a bag like this, but the Sew Together Bag isn't big enough for your needs, I ran across this pattern on Craftsy too. I know nothing about the instructions or construction methods, but it is a lot larger and might work well for carrying your quilting supplies to a class or retreat because it is big enough for you to pack a ruler in too. 

If you decide to make a Sew Together Bag, be bold and have fun with your fabric choices. The sky is the limit when you are making the outside of the bag-let your imagination run free. I googled "Sew Together Bag" and looked at "images" for inspiration. Mine are hardly original ideas, but my friends loved them and that's all that matters to me. 


Sep 24, 2015

Gift Exchange

My BFF's and I don't live near each other and when we get together, it's always so fun. We giggle like schoolgirls and enjoy each other's company so much. We also like to treat each other with a little gift. Our Chattanooga get together was no exception. 

Judy made each of us adorable hot pads in our favorite color. She also gave us a tissue cover for our purse and a cute little magnetic box. I'm going to keep my applique pins in mine.

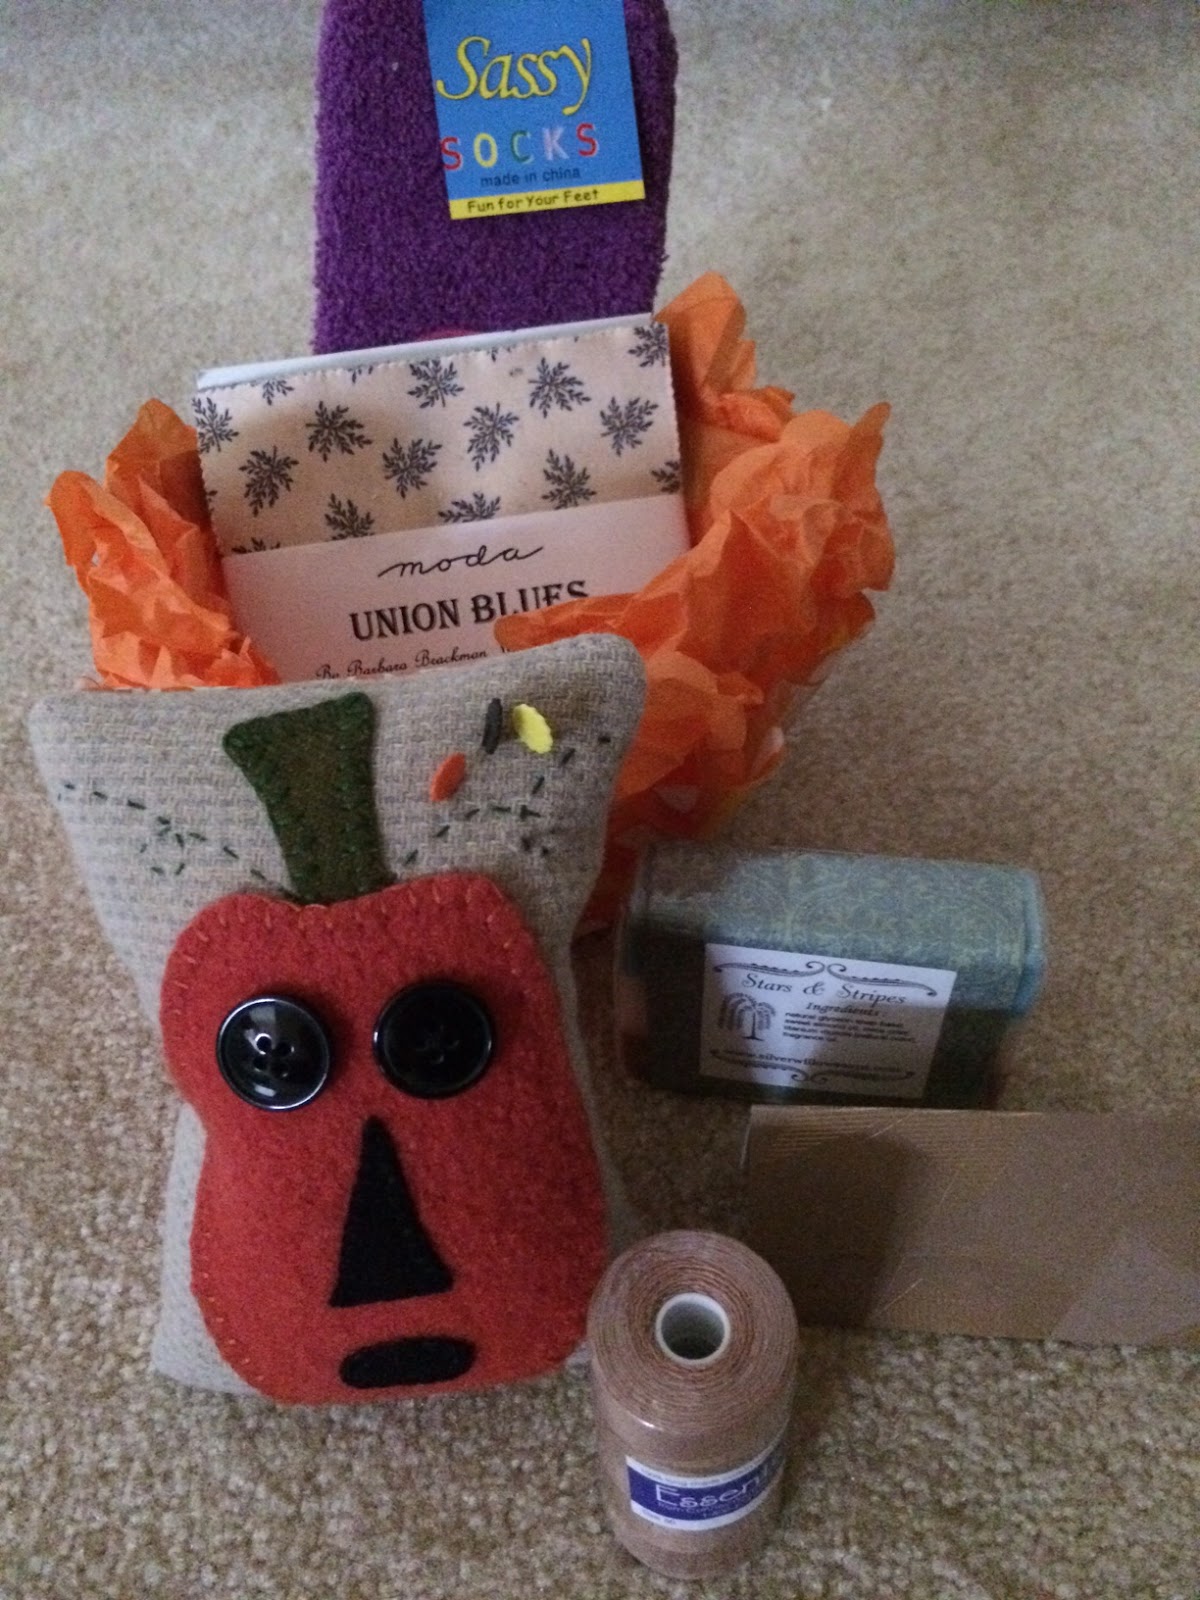
Pam made us each a wool pumpkin pincushion. She included lots of other goodies too-socks, soap, thread, and a charm pack of Civil War fabric. 

Anne treated us to really cute Fall decorations! I love my new metal pumpkin candleholder. She also gave us an assortment of Fall scented tea candles to go in it. I already have mine sitting out. And the notecards with seasonal colored leaves were perfect for writing thank you notes!


I made something for my friends too. Unfortunately, I bit off more than I could chew and made something that took more time than I had and I didn't get Anne's finished before we went to Chattanooga. I'll show you more about these bags tomorrow. Cheers!

Sep 22, 2015

Chattanooga Quilt Show


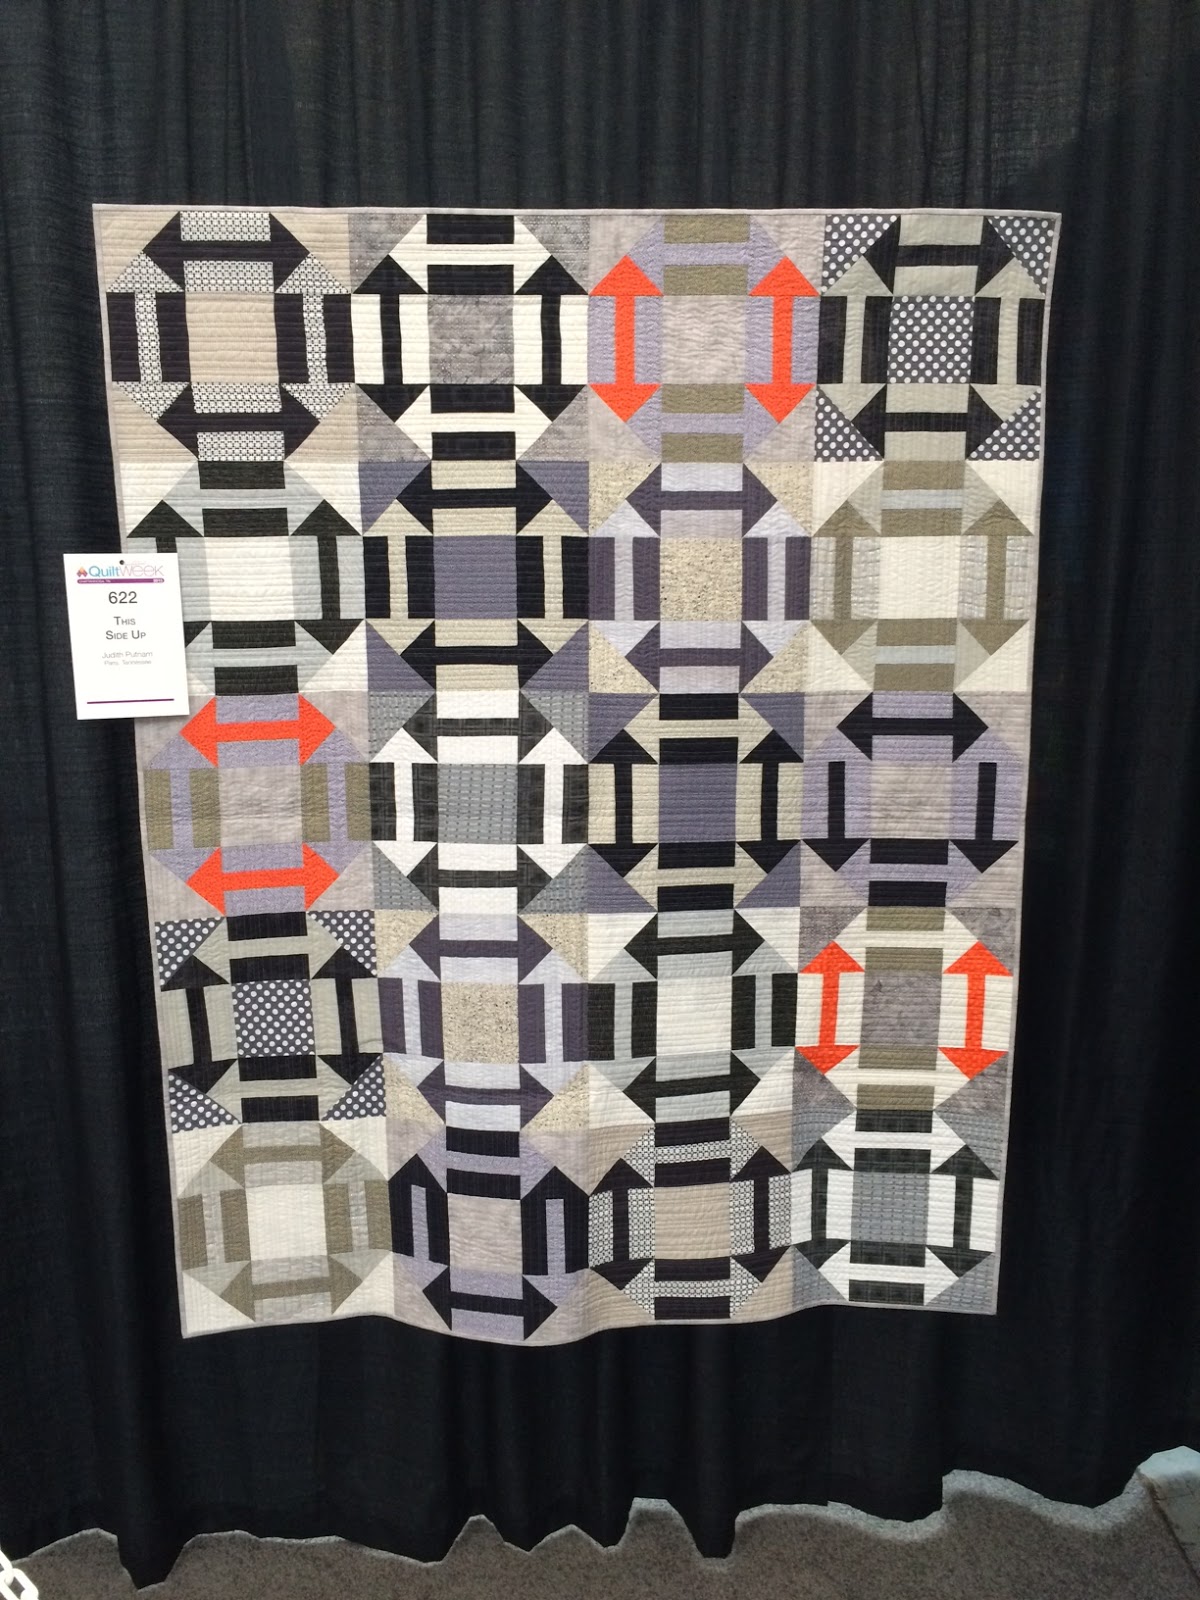
Last week was the AQS Quilt Show in Chattanooga. Pam, Anne, Judy and I made the trip and spent two fun-filled days---shopping, looking at quilts, having show-and-tell, eating out, and laughing. It is always so good for my soul to get away with girlfriends for a few days--and if it involves fabric too, even better!!

I thought you might like to see some of the quilts in the show, if you weren't able to make it. The quilts definitely leaned to the more modern side-there were only a handful of traditional quilts. So, most of my pictures are of bright, modern quilts. I hope you enjoy them.


 The bird on the right is beautifully appliqued-the bird on the left was just as beautifully quilted. It was titled Me and My Shadow.

This was my favorite quilt! It was entitled A Slice of Pi. She even quilted "Pi" in the borders-3.141592....... I love a quilter with a sense of humor :)


Here we are with the Best Of Show quilt.

This was an interesting exhibit. Cherrywood Fabrics sponsored a challenge based on Wicked. There were a lot of terrific quilts-and we each got to vote for our favorite. 

I hope you enjoyed a little peek at the show. Tomorrow I'll show you what I bought. 

Sep 17, 2015

Spool

Yesterday morning I left home with two friends, headed to Chattanooga to meet up with another friend for the AQS Quilt Show. Our first stop just HAD to be Spool-home of the BadAss Quilter's Society. Maddie was in the house and we had a blast shopping and laughing. If you've never been to Spool and you are near Chattanooga, you really need to go. Of course, we had to take a picture with Maddie to earmark the  occasion. Here we are.....

Anne, Pam, me, Judy and Maddie

Feb 23, 2015

Dress Form Pincushion and Pins


For Christmas, my friend, Judy gave me a wonderful gift. It's both very cute and very practical. She said she wanted to make me pins to use for marking my quilt blocks and rows and then decided to find a cute pincushion to put them in. She found this one at JoAnn's and knew that I would love it! And I do!!


What a thoughtful gift! The pins are all color coded and stuck into the pin cushion in numerical or alphabetical order. 


So, now when I have my blocks on my design wall and I need to take them down to stitch them, I can put pins in them before I move them and nothing is ever out of order. I can also mark my rows so that later when I am sewing them together I am able to keep them in the same position. 


To make the pins, Judy started with pearl head straight pins, alphabet and number beads, small crystal beads and crimp beads. For each set she added an alphabet bead, a crystal bead and then a crimp bead (you find crimp beads in the jewelry making section of your local craft store. The purpose of the crimp bead is to squeeze it closed around the pin, so that the other beads do not fall off.) You can add your beads in any order you prefer. 


I have a quilt on my design wall that is set on point and I have already put my number beads to good use keeping my rows straight. 


This pincushion and these pins are going to get a LOT of use. And I'm going to think of Judy every time I do. 


Happy quilting.....and pinnning,

Grammy


Aug 1, 2012

An Awesome Hinged Design Wall Made by My Awesome Husband!

I can't believe an entire month has gone by without me posting! I have been super busy quilting and now it's time to show you what I've up to. 

Before I show you quilts, I have to post about the absolutely, fabulous design wall that my husband made for me. I already have a great design wall in my quilt room, but it is always covered with a long term project and many times I have to take down the blocks to put up another project for a while. 

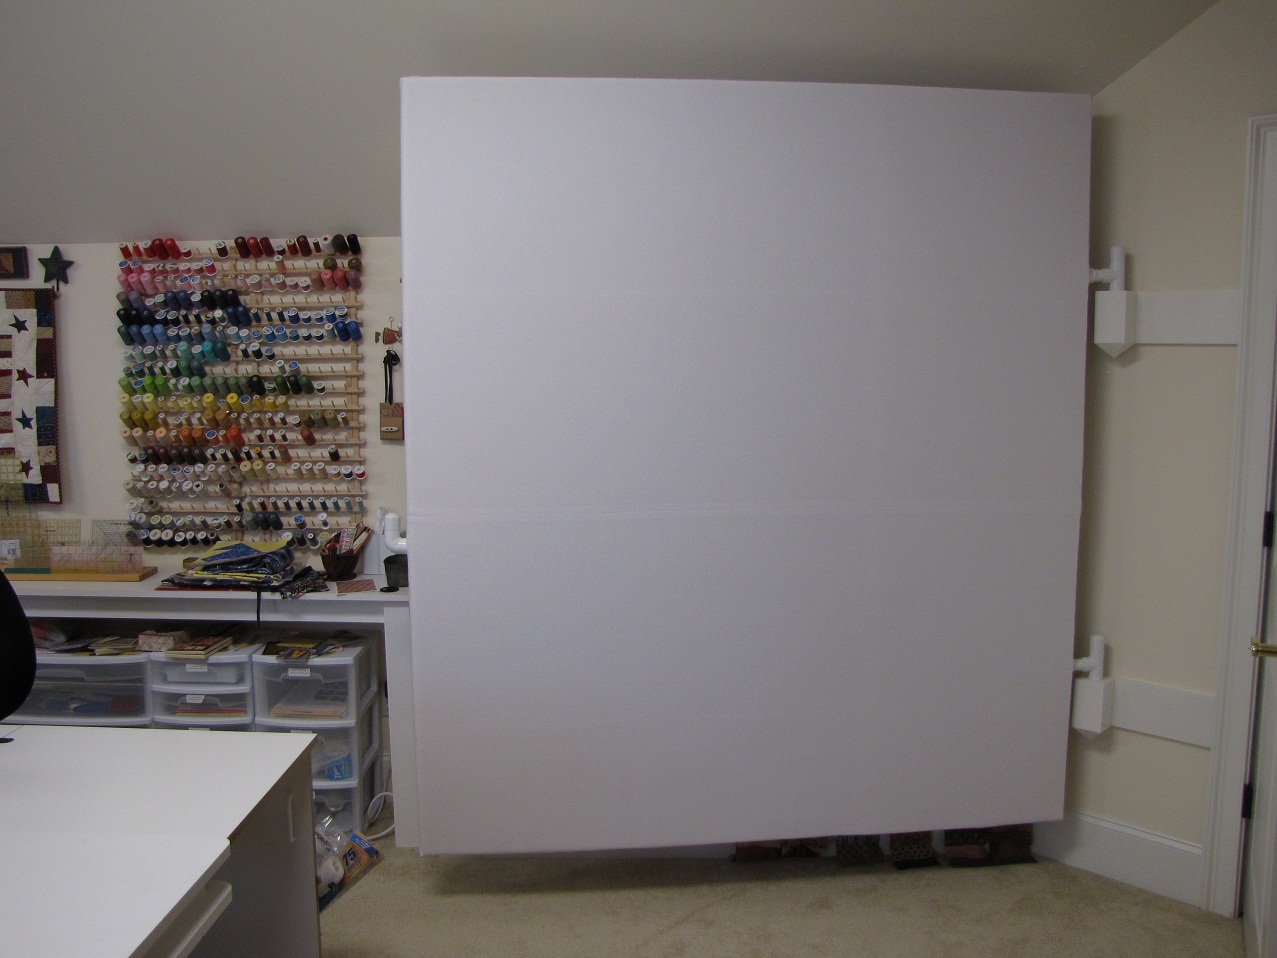
One day while my friend Judy was visiting, she said that she had been thinking about a design wall that would be hinged on the side so that you could swing it away from the wall and put blocks on both sides. I have the perfect spot in my quilt room for this, so I mentioned the idea to my husband. He spent some time mulling the idea around in his head, deciding how to make it light enough to swing well and not pull out of the wall. He decided to make a "frame" from PVC pipe and put insulation board on the front and back. I could then cover that with batting and flannel. Here are the pictures of how the project progressed from start to finish....


Here is the frame-this is a dry fit without the cross bars. The two T-joints that are sticking out on the left are where the design wall will attach to the wall. 

This is a close up of the T-joint used for the hinge.


Next step was to glue all the PVC pipe together and then cut the insulation board to size. He used Duck Tape to join the boards.


Then he glued the insulation board to the  PVC frame. He glued large pieces on each side and strips around the edges  to make it smooth.


This is the wall mount part of the hinge. He used a block of wood, drilled it out and fitted a dowel in it for the T-joint to fit over. That was affixed to the wall with a board-screwed into joists for support.


Here is my design wall hanging on the wall. Now I just need to pretty it up and make it usable.


First I covered it in batting. I bought warm and natural at Jo-Ann's on the roll. It was the perfect width. I used hot glue on the sides and bottom to hold the batting in place once I had it stretched and smooth.


Lastly, I covered it with white flannel-because it was 45" wide I had to buy twice the length I needed and seamed it. Again, I used hot glue to keep it in place, but I only used the hot glue on the edges, top, and bottom. I did not use any glue on the surface of the wall.


Here is the front of my hinged design wall! 


And here it is, swung open. You can see that I have quilt blocks on the back too-and on my original fixed design wall. Now I can work on several projects at once.

I hope you are inspired by my new design wall to find a place for one in your own quilt room. Happy stitching.............