Showing posts with label quilt room. Show all posts

May 27, 2013

Quilt Room Valances

I have to be the worst blogger on the www! May has always been a busy month in our family-as I imagine it is for a lot of others. It is the end of the school year with all the activities that go along with it. Now that our kids are grown, it is the grandkids' activities that are keeping me busy. And I don't want to miss any of them! 

I have managed to squeeze out some time for quilting. I haven't touched my applique in weeks, but Ollie's quilt top is finished! I am going to sandwich it tomorrow and start the quilting. I am so excited to get it finished--and Ollie's mom (my daughter, Melissa) is excited too. 

Today I whipped up some valances for the windows in my quilt room. Just a simple casing at the top and a hem-nothing fancy. I wanted them for a splash of color in the room. I love paisley and when I saw this fabric I knew I just had to have it! 


I bought the Q U I L T letters at Hobby Lobby. They were white and my husband spray painted them red for me. I have a little confession to make about them. See the U? Well, it's not really a U at all. In my haste to select the letters I bought an N. When we went to hang the U I discovered that the holes were drilled at the bottom! How could they make such a horrible mistake? Maybe it's because when you turn it right side up, it's an N!! I felt so stupid, but my sweet hubby just turned it around and drilled new holes in the other end for me so that I could hang it as a U! There must be some natural blond to me after all :)

So, this is how my little vignette has turned out. I love my treadle machine, the quilt frame behind it with the old quilt hanging on it and all of my neat old accessories adorning the top of the machine cabinet. And now I have a splash of red to accent it all.

Happy Quilting

Jan 13, 2013

A Clock for my Quilt Room

As you know by now, my husband loves woodworking. For Christmas this year he made our youngest daughter a long-awaited hope chest. It was beautiful and she was thrilled on Christmas morning. But, I don't think she was any more excited about it than I was surprised and excited about what he made for me!

I knew he was up to something in his workshop the last few days before Christmas and since he was wouldn't tell me what he was busy working on, I figured it was something for me. Imagine my surprise on Christmas morning when I found this-

He included everything he could think of that is a favorite of mine. I collected chicken fabrics with two friends for several years. We made and swapped chicken blocks and each made a quilt. Because of those chicken fabrics and quilts my friends and I now each have a pretty extensive chicken collection.  We even manage to each find and swap chicken Christmas ornaments every year. Yes, there really are chicken ornaments! So, my clock just wouldn't be complete if it didn't include a chicken. 

I love the ruler and scissors tucked under the wing and the spool of thread in his foot!! He actually cut these "scissors" from a piece of wood and painted them to look like a real pair of scissors. The ruler is part of a yardstick that he cut to size. Isn't he just too cute? A sewing rooster!


For the working clock he bought several packages of buttons that contained buttons that reminded him of me. There are sewing items, chickens and several flip-flops (my shoe of choice) that mark the numbers on the clock. 


The spool of thread and needle on the left side are also cut from wood. He painted the spool with blackboard paint so that I can write anything I want to on it. He wrote the saying that is on it now. 

I have my new clock hanging over the door in my quilt room. Just because I now know what time it is doesn't mean I don't lose all track of time when I get involved in my latest quilt project. 

Nov 3, 2012

New Cabinets for My Quilt Room

I have been waiting anxiously to write this blog post. My husband has been hard at work for the last two months. Now that he is finally finished I can share the fruits of his labor and my new cabinets with you. 

My quilt room is so awesome because my husband is so talented and so wonderful to me! He has made me a cutting table, a side table, an extension table, and two design walls! Now he has made me a wall of cabinets to store my fabric in. 

Before we moved to this house seven years ago I sewed in a dark corner of our den. I purchased some shelving units from Staples to store my fabric, patterns, books, magazines, etc. When we moved I used those same shelves and added to them as my stash grew. I liked them because I could also stack them and save floor space. 

But, my quilt room gets intense afternoon sun. I have had to be creative to keep my fabric from fading because it is all stored on the west facing wall, with a window in the center of the wall.

I put pieces of cardboard at the end of the shelves to protect the fabric from the afternoon sun. It wasn't the best solution in the world, but it was better than doing nothing.


I'm running out of room too! Since I took these pictures I have taken all the fabric off of the bolts and folded it flat.

You can tell how bright the sun coming in the window is-and this is with the blinds shut. I kept a piece of muslin over the bolts under the window so that they wouldn't fade.

None of this was working for me. I needed more storage-something more efficient than the open shelves.  I mentioned to my husband that I would love to have cabinets to store my fabric in, so that I could keep the sun and dust off of it. I drew up a sketch on graph paper and showed it to him. The next thing I knew we were moving all the shelves and he was measuring for cabinets! I didn't even have a chance to catch my breath. 

It was so sad and empty at that end of the room with all the shelves and fabrics moved. It was very depressing to me. 


And the room was a mess too!! All that stuff had to go somewhere. It was moved and shoved to any empty spot where there was floor room for it. The shelves were so close together that I couldn't see the fabric or get to anything I wanted without sliding them a little bit to make a space between them. That was no easy feat, either-those shelves full of fabric are HEAVY!


My husband was very busy in his workshop for weeks building BIG cabinets for my quilt room. I loved going downstairs every day to see the progress.

After they were assembled, primed and painted, I helped carry the cabinets up two flights of stairs from the basement to the second floor. I was getting so excited at this point! I was giggling like a little girl on Christmas morning. 


First a "dry fit" to make sure that everything was going to work. Already I could see my vision coming to life. After the cabinets were in place they had to be shimmed and leveled and then installed. It was sooo hard to be patient!


All ten cabinets are installed at this point and it's coming along--but there is quite a bit of sanding going on, too. 


A fine dust was coating every inch of the room--I pulled old sheets out and covered all the fabric in the room. My hubby still needed to make the open shelves that will be installed on the far right and far left of the cabinets. 

For a week I watched and waited--and I must admit--impatiently. I was so excited to see my room being transformed with a wall of cabinets! And I wanted to put my fabric on the shelves so badly!! It was killing me to just look at all of those gorgeous EMPTY shelves and not fill them with my fabric.

At last!!! The paint was dry, the shelves were cleaned and all my fabric is finally in its new home! I just love it-it is everything I envisioned it to be. Everything has its own place~nice and neat and folded and stacked and YUMMY! There is even a cute little seat under the window-I know my granddaughters are going to love sitting there.


On this side I have all of my "fabric by color", homespuns and brushed cottons, hand-dyed, and some backing fabrics. In the upper tall cabinet are all my conversation prints-chickens, I-spy, seasonal, etc. 


On the right side of the window I have my collections of Civil War repros, 30's repros, and Kansas Troubles. I also have a lot of future projects stacked and waiting to be sewn.


My Civil War reproduction collection. I love Jo Morton and Judie Rothermel. I also have some Barbara Brackman and lots of shirtings to use with them. 


My Kansas Troubles fabrics. I have over 1,000 different 5" charms. Someday I am going to make a true charm quilt out of them-no two fabrics in the quilt will be the same. I have already made several quilts out of my stash of Kansas Troubles fabrics and I see several more in those stacks.


It's like a tall tower of delicious-ness. I love all my fabrics. I am so excited to get back into my quilt room and sew again. 


My new motto. :-) I bought this sign at the Sewing and Quilting Expo last week. My husband just chuckled when he saw it. 

The open shelves on the outside edges are going to be fun for display and practicality. One of these jars has selvages and the other is my binding jar. I also have two cute Singer tins that I keep patterns in. I sure wish I could find more of them.


I love looking at the fabric so much! It's almost sad to put cabinet doors on and close it all up. I am inspired when I see all the fabric.

Here we are! Welcome.......come on in. All of the cabinet doors are installed and everything is finished. I love the way it looks. I decided that I wanted red knobs on the cabinets to give a pop of color to the room in that sea of white cabinets. I bought large wooden knobs and my husband spray painted them for me. He also took the knobs off of my cutting table drawers and painted them red too. (He's a sweetie!)

I have died and gone to quilting heaven when I'm in this room. I could just move in and never leave (except when I get really hungry).


I love the little window seat! And my granddaughters are going to love it too. 

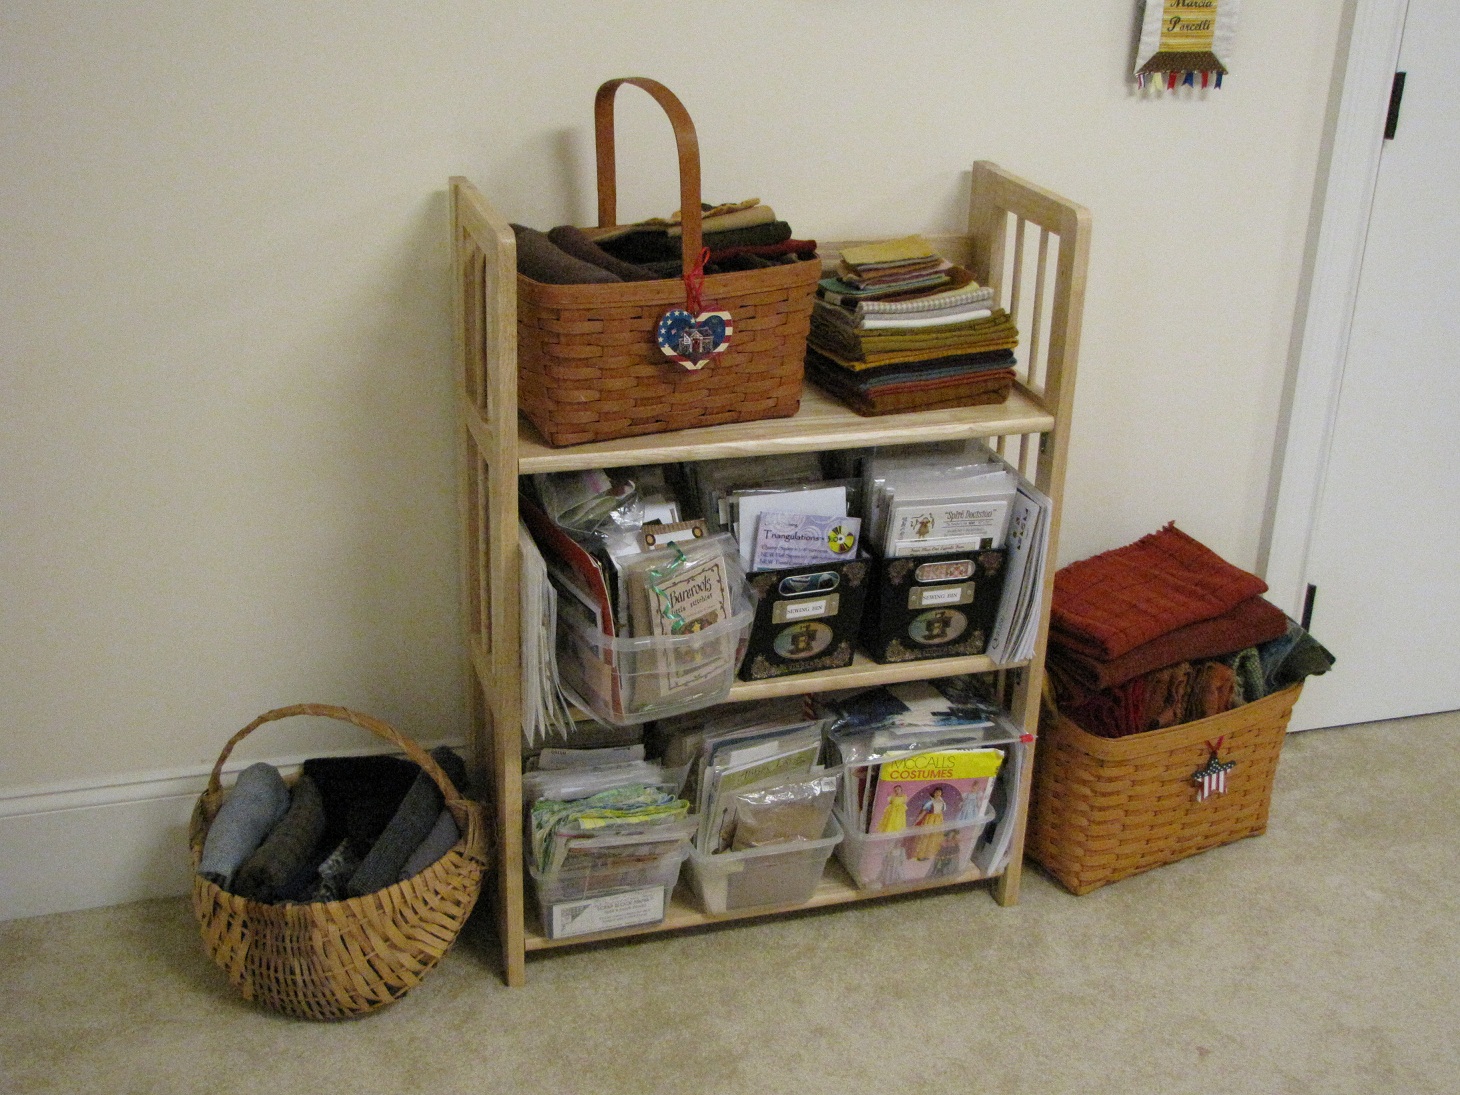
I kept one of my old shelf units. My wool and patterns are here. Maybe one day I will have used up enough of my fabric to make room for the wool in the cabinets too.


Everything is so neat and organized now. I am excited to get back in the room and finish up a few projects that are waiting for completion.

I also picked up a free quilting frame at a quilt shop a few weeks ago. It was just sitting in a box in the corner of the room by the sale fabric with a sign on it that said "free". I decided that it needed to come home with me. There were no instructions with it, but I laid all the pieces out and figured out how to put it together. The extra rods on the floor are to extend the length for a bigger quilt. I haven't decided what I am going to do with it yet. I don't hand quilt, so it's going to be a display piece~just not sure where.

I hope you have enjoyed the tour of my quilt room with its new cabinets. 

Happy Quilting!

Oct 28, 2012

French Message Board

This post isn't about quilting, but I did use fabric for this project, so I'm thinking it could be blog-worthy.

I have always wanted a French message board. I love the look of them and I thought that I could make one using the fabrics that I like that go with my decor instead of buying one and making do. 

After my husband made my hinged design wall we had a little bit of the foam insulation board left over and I decided to use it to make a message board. While I was shopping at Jo-Ann's the other day I spotted a piece of home dec fabric that I liked-and it was on sale. I had no idea how big I was going to make my board, so I decided to purchase one yard. I picked out ribbon that I thought would work well and then I decided on covered buttons. 

I had a large enough piece of foam board to make my board 25 X 35". I covered it with batting and then my fabric. If I had used a stretched canvas for my form I would have been able to staple my batting and fabric, but I had to use hot glue since I was using foam board. I fiddled with the ribbon for about an hour before I got it evenly spaced and how I wanted it. I stretched it around to the back and glued it down too. The buttons were fun to cover and really added the detail touch I wanted. Again-hot glue was my method for finishing.

I am pleased with the results and would even consider making them for gifts. It was a fun and creative way to pass the evening. I love having a place to tuck all the cute cards my friends send to me~now I can really enjoy them instead of just tossing them aside in a basket.


Happy quilting.

Aug 1, 2012

An Awesome Hinged Design Wall Made by My Awesome Husband!

I can't believe an entire month has gone by without me posting! I have been super busy quilting and now it's time to show you what I've up to. 

Before I show you quilts, I have to post about the absolutely, fabulous design wall that my husband made for me. I already have a great design wall in my quilt room, but it is always covered with a long term project and many times I have to take down the blocks to put up another project for a while. 

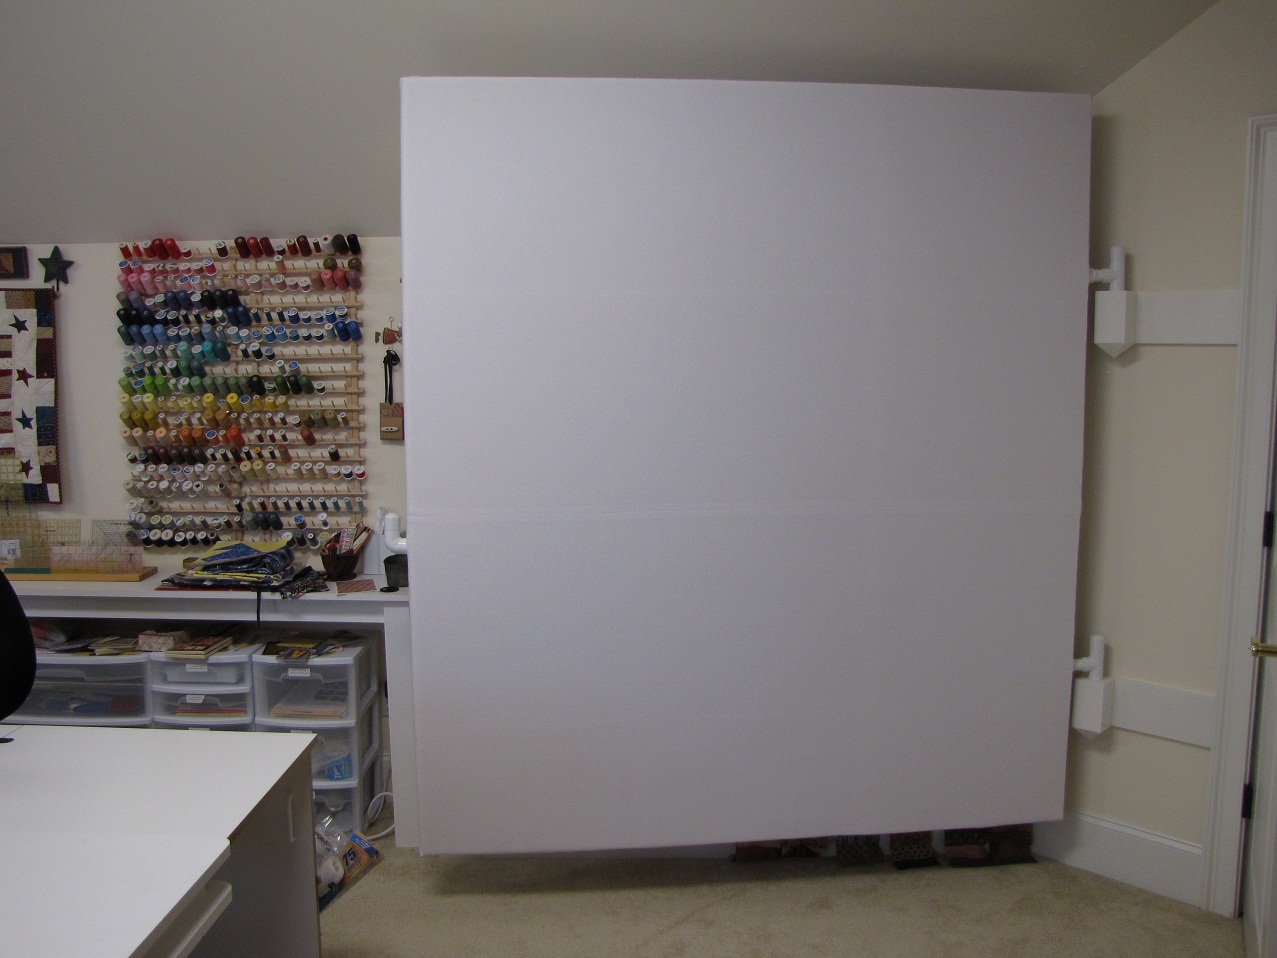
One day while my friend Judy was visiting, she said that she had been thinking about a design wall that would be hinged on the side so that you could swing it away from the wall and put blocks on both sides. I have the perfect spot in my quilt room for this, so I mentioned the idea to my husband. He spent some time mulling the idea around in his head, deciding how to make it light enough to swing well and not pull out of the wall. He decided to make a "frame" from PVC pipe and put insulation board on the front and back. I could then cover that with batting and flannel. Here are the pictures of how the project progressed from start to finish....


Here is the frame-this is a dry fit without the cross bars. The two T-joints that are sticking out on the left are where the design wall will attach to the wall. 

This is a close up of the T-joint used for the hinge.


Next step was to glue all the PVC pipe together and then cut the insulation board to size. He used Duck Tape to join the boards.


Then he glued the insulation board to the  PVC frame. He glued large pieces on each side and strips around the edges  to make it smooth.


This is the wall mount part of the hinge. He used a block of wood, drilled it out and fitted a dowel in it for the T-joint to fit over. That was affixed to the wall with a board-screwed into joists for support.


Here is my design wall hanging on the wall. Now I just need to pretty it up and make it usable.


First I covered it in batting. I bought warm and natural at Jo-Ann's on the roll. It was the perfect width. I used hot glue on the sides and bottom to hold the batting in place once I had it stretched and smooth.


Lastly, I covered it with white flannel-because it was 45" wide I had to buy twice the length I needed and seamed it. Again, I used hot glue to keep it in place, but I only used the hot glue on the edges, top, and bottom. I did not use any glue on the surface of the wall.


Here is the front of my hinged design wall! 


And here it is, swung open. You can see that I have quilt blocks on the back too-and on my original fixed design wall. Now I can work on several projects at once.

I hope you are inspired by my new design wall to find a place for one in your own quilt room. Happy stitching.............

Feb 16, 2012

My Quilt Room!

I have everything a quilty girl could want~I have my own room, a great sewing machine, and fabric and patterns galore.  Lots of quilters blog about their space and others look at their pics for inspiration.  I have decided to post a few pics to show that you can have a great room and not spend a fortune~but it does help to have a handy husband.  :)


I prefer to sew on a flat surface, so I purchased a cabinet for my sewing machine.  When I got my sit-down long arm I backed the two machines up to each other. It gives me a wonderful large surface for piecing and quilting. 


My husband made this drop down surface to the left of the machine. The legs come out and the extension drops down when it is not in use.  You can also see my design wall in this picture.  It is two sheets of insulation board taped together and then cut to size. I covered it in flannel and it's nailed to the wall.  I think we are going to eventually hinge it on the right side and make it two sided!! 

I love my cutting table!  We went to the hardware store and bought 4 unfinished lower kitchen cabinets, painted and fastened them together, then added the top.  It's a great surface~and just the right height for me. I wanted the overhang for the bar stool.  I sit there to look at quilt magazines or sketch out patterns~it is also a terrific place for a little granddaughter to sit and visit while I am working.   

My husband also made this long table for me and I bought the plastic drawers at Wal-mart to store "stuff" in.  I keep all my rulers on top (he cut ruler racks for me too~I told you a handy husband is an asset)


The shelves I use for storage fabric came from Staples.  I really like them because they are stackable--each of these is two units stacked together.  I have two more sets on the other side of the window.


A place to curl up and hand sew or look at quilt magazines or books is a bonus.  It's a cozy corner and I love to sit here. 


That's it~my quilting space. I wish I just had more time to spend there....